Terraform for the ARM Template Developer
The files used in this article can be found in GitHub here: https://github.com/ssemyan/BasicAzureLinuxVmTerraformTemplate
In a previous post - Creating Azure Resources with ARM Templates Step by Step – I explain how to use Azure ARM templates to describe and deploy resources in Azure.
With many companies adopting a multi-cloud strategy, the idea of a single toolset to deploy to different public clouds has become popular. The open source tool Terraform tries to address this by providing a common framework to create and modify infrastructure whether on-prem or in the cloud by abstracting out the specific APIs.
The goal of this post is to compare the Terraform way of doing things with my previous article on ARM templates. If you are new to ARM templates, you may want to refer to my other article first. I list some Terraform resources at the end of the article including basic tutorials and install instructions.
For this article I’ve kept the resources and file structures similar to my ARM example. One change, however, is I now use managed disks instead of storage account based disks.
Providers
Terraform allows modification and configuration of all types of resources - from on-prem physical machines to cloud-based resources. This is accomplished via different providers that abstract out the underlying APIs. You can see a list of Terraform providers here. Documentation for the Azure provider can be found here.
In ARM Templates, resources are referred to by type and the API version that they exist in:
{
  "name": "MyVnet",
  "type": "Microsoft.Network/networkInterfaces",
  "apiVersion": "2016-09-01",
  ...
}
With Terraform, you specify the resource as it is named in the provider and then give it a local name you can refer to it by in the Terraform (in the example below, the resource type is azurerm_virtual_network - a vnet from the azurerm provider - and the local name for this vnet - used only in the Terraform file - is vnet1):
resource "azurerm_virtual_network" "vnet1" {
  name                = "MyVnet"
  ...
}
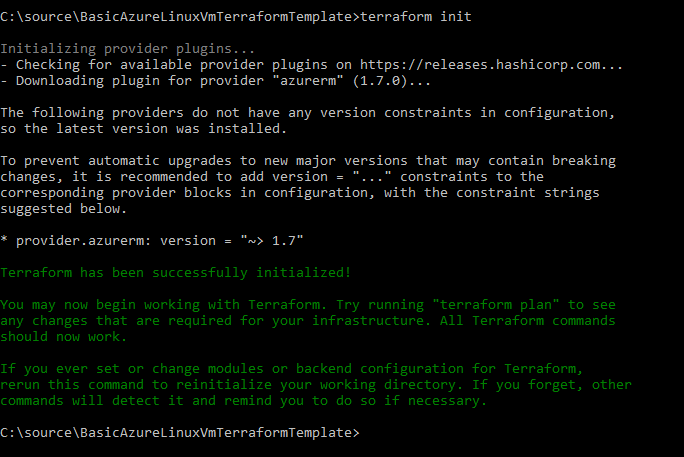
The provider must be downloaded and be available locally. This is done by running the init command which downloads all the providers referred to by the template files (similar to how npm install downloads the node packages from packages.json).

Commands and Files
When running ARM templates with PowerShell, there are two main commands: Test-AzureRmResourceGroupDeployment is to test a deployment (looking for errors) and New-AzureRmResourceGroupDeployment which does the actual deployment. Each command accepts a single template file and parameter file to be run in that resource group. For example:
New-AzureRmResourceGroupDeployment -ResourceGroupName $resourceGroupName -TemplateFile $templateFilePath -TemplateParameterFile $parametersFilePath
With Terraform you have four main actions – init, plan, apply and destroy.
- terraform init will prepare the directory, download any listed providers, etc. You run it once in a new Terraform project and then again if anything changes
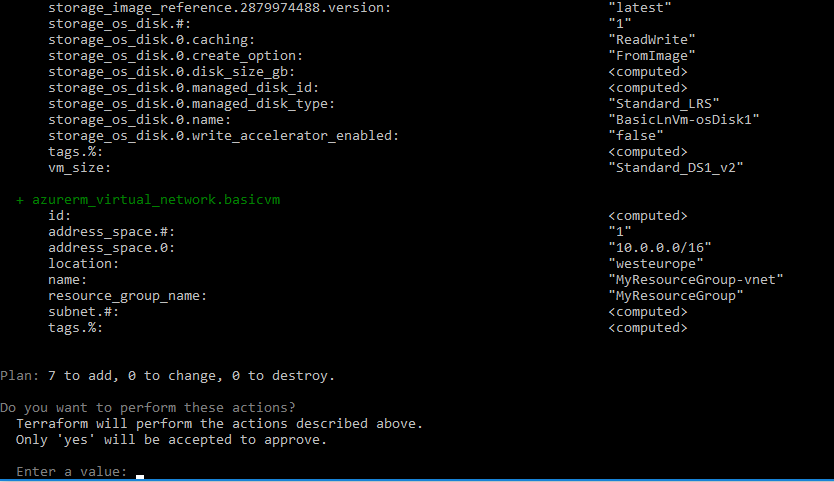
- terraform plan will show all the changes that potentially will be made if the Terraform is run. It is like doing a test run
- terraform apply does the actual creation or change of the resources
- terraform destroy will delete the resources described in the template files
Note: with the terraform commands, you don’t have to specify the input files. Instead, Terraform will load and combine the all the relevant files in the current directory. Template files end with .tf and variable files are named either terraform.tfvars or *.auto.tfvars - thus, you can separate and name your files whatever you like (e.g. all the networking resources in a file called networking.tf, all the networking variables in a file called networking.auto.tfvars, etc.)
Resource Groups
The first difference between ARM and Terraform to point out is resource groups. When running ARM templates, the template runs within a resource group that must already exist. If you have resources that span resource groups, you will need to deploy them separately (one per resource group).
Terraform allows resource group creation so you can have multiple resource groups (and their associated resources) within a single Terraform definition.
Parameters and Variables -> Variables and Locals
ARM templates have parameters (that may change between deployments), variables (that change less often) and the actual resource definitions (which don’t generally change). With ARM, parameter values can be placed into a separate file (e.g. parameters.json) or entered at runtime.
Terraform parameters are called variables and their values can be stored in a file (e.g. terraform.tfvars), entered on the command line (e.g. var ‘access_key=foo’), or via environment variables (e.g. set TF_VAR_access_key=foo).
For comparison here is a parameter definition in ARM (contained in the .json template file):
"parameters": {
    "location": {
      "type": "string",
      "defaultValue": " westeurope",
      "metadata": {
        "description": "Which region to use."
      }
    }
}
Here is the same parameter (called a variable) in Terraform (contained in a .tf template file):
variable "location" {
  description = "Which region to use."
  default = "westeurope"
}
Setting a value for a parameter in an ARM parameters.json file looks like:
"parameters": {
        "location": {
            "value": "centralus"
        }
}
Setting a value for a variable in a Terraform terraform.tfvars file looks like:
location = "centralus"
In ARM templates, you use variables to store values that do not change as often as parameters but that you don’t want to code in-line with your resource descriptions. An example might be the name of the VNET. In Terraform, these are called locals.
For example, for the virtual network name, I use the name of the resource group with “-vnet” post-pended.
With ARM, this looks like this:
"variables": {
    "virtualNetworkName": "[concat(parameters('resourceGroupName'), '-vnet')]"
}
With Terraform, this looks like this:
locals {
  virtualNetworkName = "${var.resourceGroupName}-vnet"
}
When making use of parameters and variables in ARM templates you refer to them like so:
{
      "name": "[variables('publicIpAddressName')]",
      "type": "Microsoft.Network/publicIpAddresses",
      "apiVersion": "2016-09-01",
      "location": "[parameters('location')]",
      "properties": {
        "publicIpAllocationMethod": "[variables('publicIpAddressType')]"
      }
}
With Terraform, they are referred to as:
resource "azurerm_public_ip" "basicvm" {
  name                         = "${local.publicIpAddressName}"
  location                     = "${var.resource_group_location}"
  ...
  public_ip_address_allocation = "${local.publicIpAddressType}"
}
Resources and Dependencies
The next difference to note is how resource dependencies are determined when defining resources. With ARM you must explicitly specify that a resource depends on another resource by either nesting the resources or listing them in the dependsOn property. With Terraform, dependencies are implied by referring to the dependent objects, so no explicit dependency declaration is needed (although it can be done if you want to control the order of creation).
For example, here is how I create a NIC with ARM:
{
      "name": "[variables('networkInterfaceName')]",
      "type": "Microsoft.Network/networkInterfaces",
      "apiVersion": "2016-09-01",
      "location": "[parameters('location')]",
      "dependsOn": [
        "[concat('Microsoft.Network/virtualNetworks/', variables('virtualNetworkName'))]",
        "[concat('Microsoft.Network/publicIpAddresses/', variables('publicIpAddressName'))]",
        "[concat('Microsoft.Network/networkSecurityGroups/', variables('networkSecurityGroupName'))]"
      ],
     "properties": {
        "ipConfigurations": [
          {
            "name": "ipconfig1",
            "properties": {
              "subnet": {
                "id": "[variables('subnetRef')]"
              },
              "privateIPAllocationMethod": "Dynamic",
              "publicIpAddress": {
                "id": "[resourceId(resourceGroup().name,'Microsoft.Network/publicIpAddresses', variables('publicIpAddressName'))]"
              }
            }
          }
        ],
        "networkSecurityGroup": {
          "id": "[resourceId(resourceGroup().name, 'Microsoft.Network/networkSecurityGroups', variables('networkSecurityGroupName'))]"
        }
}
In the above ARM example, I specify that the VNET, Public IP, and network security group must be created before the NIC can be created by listing these resources in the dependsOn section.
The Terraform version looks like:
resource "azurerm_network_interface" "basicvm" {
  name                = "${local.networkInterfaceName}"
  location            = "${var.resource_group_location}"
  resource_group_name = "${azurerm_resource_group.basicvm.name}"

  ip_configuration {
    name                          = "ipConfig"
    subnet_id                     = "${azurerm_subnet.basicvm.id}"
    private_ip_address_allocation = "dynamic"
    public_ip_address_id          = "${azurerm_public_ip.basicvm.id}"
  }
}
In the example above, because I refer to the subnet and public IP via the ID of the object, this means Terraform will create these resources first (and then obtain the IDs of the created objects) before creating the NIC.
Data
Sometimes you need to retrieve a value from an existing resource to use. In ARM, you have helper functions such as resourceId that will look up the ID of a resource previously created based on the name. For example:
"variables": {
          "nsg_id": "[resourceId('MyResourceGroup', 'Microsoft.Network/networkSecurityGroups', 'MyNsg')]"
}
This will create a variable ‘nsg_id’ by looking up the ID of an NSG contained in the resource group ‘MyResourceGroup’ with the name ‘MyNsg’ and obtaining the resource ID for it.
To do the same thing in Terraform, we use the ‘data’ resource type. For example, to get the ID of an existing NSG and output it at the end of the Terraform we would do:
data "azurerm_network_security_group" "test" {
  name                = "MyNsg"
  resource_group_name = "MyResourceGroup"
}

output "nsg_id" {
  value = "${data.azurerm_network_security_group.test.id}"
}
State
The last item to note, is the concept of state. ARM Templates are stateless in that they describe the end state of the resources. When run, the ARM mechanism will determine what needs to be done to make the changes to the resource group to match the state described in the template. This may mean creating or modifying resources as needed. Unless run in incremental mode, running an ARM template will not remove resources not listed in the template.
Terraform, however, requires that the state of the deployment be persisted. This includes all the changes that Terraform has made. This state is used to determine what to change or delete when the template file is changed. If the state file is lost or corrupted Terraform does not know what has been created and therefore will simply try to recreate everything. For groups working together, it there are ways to share state across users. State in Terraform is a large topic and more information can be found here.
Conclusion
Hopefully this article gives experienced ARM template developers a better idea of how Terraform works. The source code referenced can be found here: https://github.com/ssemyan/BasicAzureLinuxVmTerraformTemplate
To run this Terraform against your Azure account (which will create a Linux VM along with the associated networking), you must either create a service principal and enter the associated values in the .tf file, or log in to Azure using the Azure CLI (e.g. az login). This process is described in detail here.
Before you run the Terraform, change the values in the terraform.tfvars file including setting the ssh key (if you need help creating a key, you can refer here. You then run the terraform by issuing the following in the directory:
terraform init
terraform apply
The Terraform will first show you what will be created and ask for a confirmation. After typing ‘yes’, the resources will be created, and the resulting public IP and ssh command returned.

To destroy the installation and delete all the resources that were just created, type:
terraform destroy
Additional Resources
Official Terraform on Azure Documentation from Microsoft
Creating Azure Resources with Terraform by Eugene Chuvyrov
Official Azure Provider for Terraform
GitHub repo for the Azure Provider including examples
For a more opinionated take, here is an article from Sam Cogen - Using Terraform with Azure - What’s the benefit?